Wednesday, February 27, 2013

Hello Spring Card

Hello!  I hope you are all doing well today.  Today I would like to share a card that I made for the Critter Sketch Challenge #153.  I tried to stay as close as possible to the sketch.  I used my Cricut to cut the ovals, oval mattings and the clovers.  I used clovers as my greenery, in honor St. Patrick's Day (the first sign of spring at our house anyway) and a Tim Holtz die for the flower.  The stamp is by My Creative Time. 
I hope you enjoyed the card and thanks for stopping by and taking a look. 
 
Margaret

Cheerful Happy Everything Card

Hello, everyone!  Hope everyone is having a great day.  Today I am posting an entry into the Muse Challenge #6.  The inspiration for my card came from the card provided by Deanna Jean.
I haven't made many cards and I am trying to participate in more card challenges to gain a little more experience.  I used the colors in this card to inspire me to stamp a bright and cheerful background for a card.
I then embossed a small piece of vellum to add a little interest and then inked the embossing with coordinating ink and placed this in center of the card face.  I cut my center pieces with the Elegant Edges Cricut cartridge and then stamped with a Jaded Blossom sentiment, from the Simple Sayings 2 set.  I love how this card turned out.  

Thanks for stopping by and taking a look.  Please take the time to stop by the Muse Card Making Club to see what all the members have created.  Thanks again for stopping by and as always if you like what you see please become a follower.  See you soon.

Margaret

Tuesday, February 26, 2013

CAS(e) Challenge #16

Hi, everyone!  I just completed a card for the CAS(e) Challenge #16.  Using the provided sketch, I completed my card in about 1 hour.
I made a St. Patrick's themed card. that I will be giving it to my kids.  They will need some luk this year trying to catch Liam, the leprechaun in our yard( you can learn more about this tradition at:
I used Jaded Blossom, Luck of the Irish stamp set, to stamp the internal and external sentiment.  A simple "Happy St. Patrick's Day" is stamped inside the card.  I also used my Cricut and A Child's Year cartridge to cut out the three clovers and some burlap to give the card some added dimension.  I am extremely pleased with this card.  Please take some time to stop by and take a look all the cards at CAS(e) Sketch Challenge.
 
I hope you liked the card and thanks for stopping by.
 
Margaret

Saturday, February 23, 2013

A is for America Layout

Hello!  How is everyone doing today?  I have had a great week.  Thursday night, Steven (my 8 year old son) had a play at school.  He was so nervous, you see he was Abraham Lincoln.  He did a fine job.  I am so proud of his performance.  The entire cast did a great job.  I have made a layout for this occasion.  I used my Cricut to create the title and the silhoutte of Lincoln.  I made a pocket for a disc of the play that I recorded.  I also made two journaling tags.  One of the tags, I had my son write his lines from the play.  The second tag is where I will do my journaling.
Below you can see the envelope for the DVD tucked beneath the photo matting.  I may even tuck my journaling tag in the envelope.
You can see below the journaling tag my son wrote his lines from the play on.   I also had made a rosette from red and white striped ribbon and my son said "it looks a little girlie" so I made another rosette from burlap and layered it over the ribbon rosette.
I hope you enjoyed this layout.  I really came together pretty fast and most of all my son loves it.  Thanks for stopping by and if you liked this and my other work please become a follower.  Once again, thanks for taking a look.

Margaret

Thursday, February 21, 2013

Lucky Liam Layout

Hello!  Today I have made a layout for St. Patrick's Day.  My kids love to set animal traps(no need to worry about animals being injured, these traps just contain the animals) out the night before St. Patrick's Day. They have done this every year for 6 years, except for last year.  Last year they got a very special gift delivered, a little brother that was born March 13th, but he didn't get to come home until the 17th.  I think they were so excited about the new addition they forgot to set their traps out.  They scatter Leprechaun food (just gold/green glitter and oats) in the yard and around their traps.  Sometimes my kids make up snare traps and other contraptions also.  They have been known to place carrots, chocolates or any thing they think may entice the Leprechaun into their MANY traps.  The following morning they find "gold" dollar coins, gold/green buttons, strips of fabric (that ripped from the Leprechauns' clothing) and sometimes red hair.  They get so excited when they find the letter and coins that Liam leaves them for their trouble.  Yes, their leprechaun has a name, Liam, and he is mischievous.  I used several MCT dies for this layout.  I even convinced the kids to give me a few of the buttons that they have found in their traps in past years.  They would not give me any of the gold buttons, those are too precious, but they did give me some of the other buttons.  They did tell me that if they found some pieces of his clothes, I was welcome to a couple of those.  Those are treasures also.  This is what I came up with:
I embossed my title, Lucky Liam.  I even used several sentiments from the Christmas MCT stamps on this layout, the 98% nice and 2% naughty and the Believe.  They were so cute on the layout.  I made a brad with coordinating paper with my i-topper and used that brad to create a flower. 
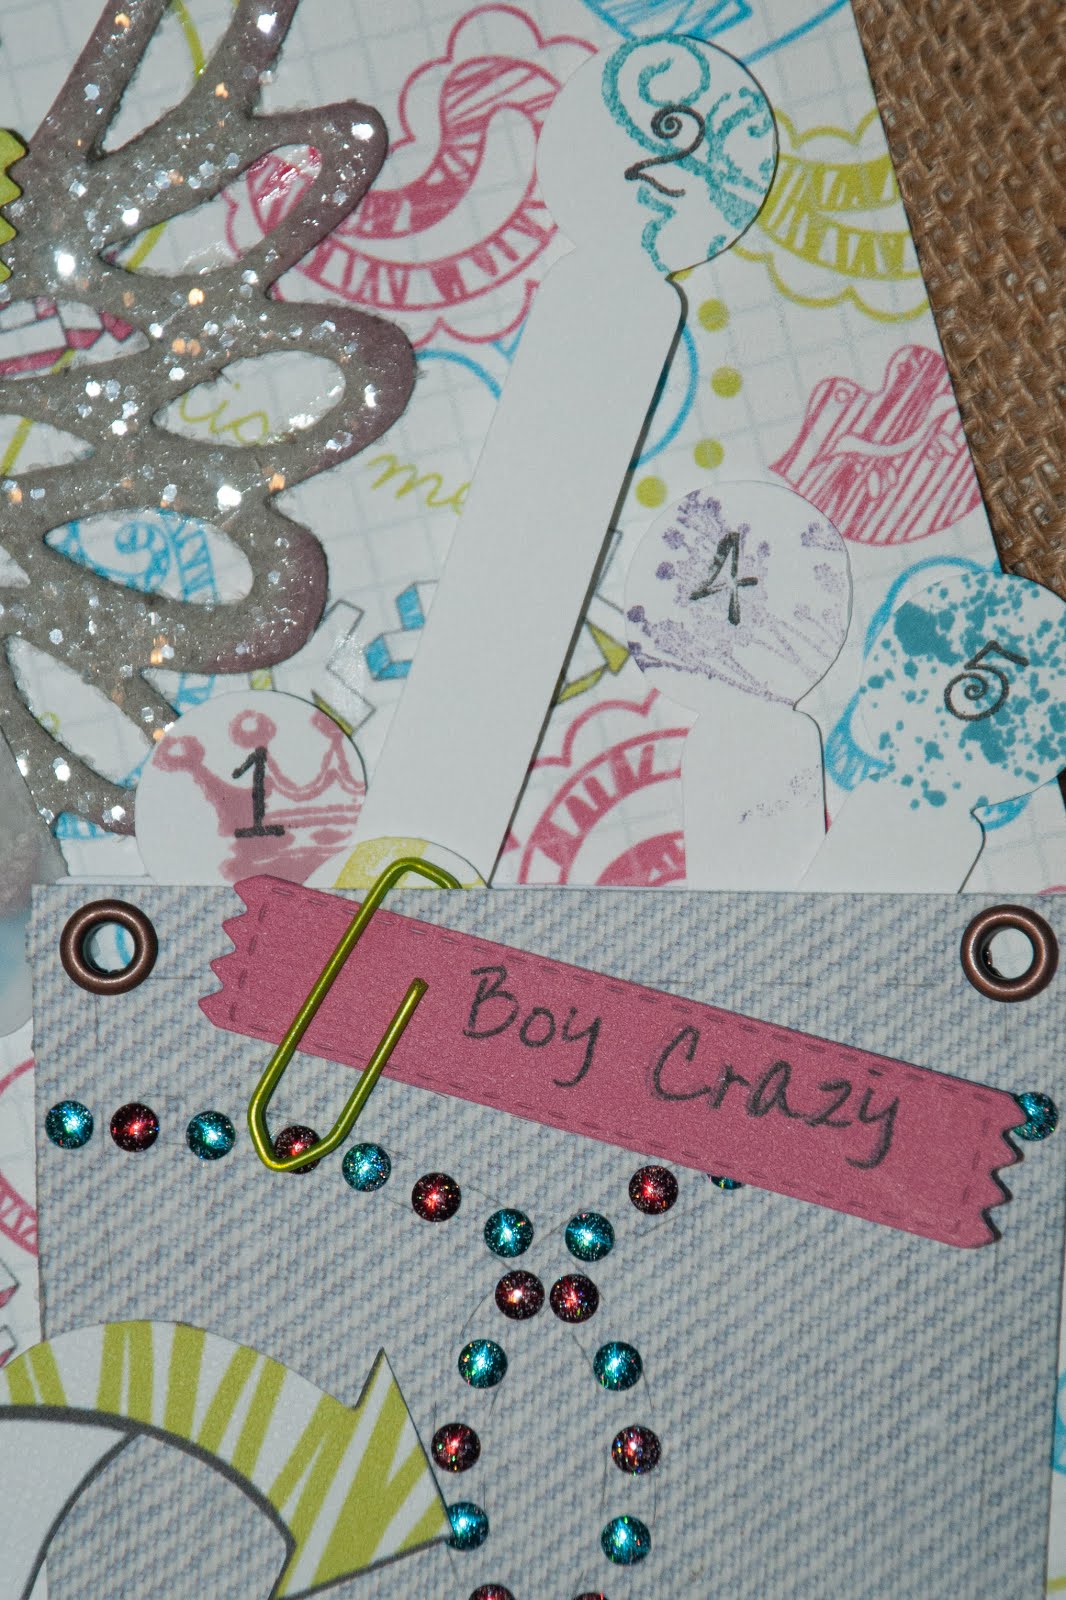
I made a envelope with a MCT die to hold all their little memories.  I embossed a portion of the envelope and then used ink to color the design.  I must say it turned out gorgeous.  I also created a tag and punched a hole, that I will lace with some of that promised fabric.
I only used my Cricut to cut the clovers and the small grey silhoutte of Liam.  I inked the edges of all the photo mattings, clovers, tags and Liam.  I stamped an image over Liam so that it would appear that he was trying to hide in the brush. 
 
I hope you have enjoyed the layout and thanks for stopping by to take a look.  I am submitting this into the Cuttlebug Spot Cute as a Button Challenge and the MCT Smashy Challenge.

Margaret

Wednesday, February 20, 2013

Kiss the Cook Layout

Hello!  It's been a few days since I posted anything, I know.  I was sick a few days and I spent a long weekend, Friday thru Monday, with my family.  I thought I would share a layout I created for an experience I shared with my youngest daughter, Katherine.  A few months back, I began making a strawberry cake for her, which is her favorite.  Before I was done, she had pulled a chair up to the counter and was mixing the cake herself.  She had such a big smile on her face and she was just tickled to be making her own cake.  I used the Kate's Kitchen Imagine Cartridge to print papers for the layout.  I also used the From My Kitchen cartridge for the recipe cards and tabs, the lips came from the Indie Art cartridge and the font is from the Type Candy Cartridge.


I hope you enjoyed the layout and thanks for stopping by and taking a look.  Hope to see you again soon.  If you like what you have seen please become a follower.  Thanks again.

Margaret

Friday, February 15, 2013

Nature Layout

Hello!  I am posting a layout for a picture that I took this summer on the Cossatot River, near Horatio, AR.  My family and I lease some property with a cabin.  The cabin is minimal, but the fun is overflowing at the river.  Everyday I get some amazing pictures of everyday creatures.  This layout is for a picture I snapped of a frog that was soaking in a side pool of the river.  You could see the top part of his body above the water, hanging on to a small branch, and you could also see his feet, I guess that is the correct biological term, below the clear water.  It was a great picture.  I have not printed the picture yet, so I just left the matting empty.  I cut the matting from a cut I created with my Gypsy and the leaves from the Storybook Cricut cartridge.  The matting was cut from a pearlescent paper. I stamped a journaling area.  I also stamped and embossed some plants on this layout (the bottom picture) and placed some burlap on the page to add some dimension and texture to the page.  I did not  make a title, because I think that I will just title the album I put all my nature layouts in.  
I am submitting this into the My Creative Time Embossing Challenge.  I hope you enjoyed the layout and thanks for stopping by and taking a look at this layout.

Margaret

Wednesday, February 13, 2013

Boy's Valentine Backpacks

Hello!  Today I finished making some backpacks that are treat holders for three of my sons.  I had made purse treat holders for my two daughters earlier in the week (you can take a look at those two purses here:  http://1creativemomof6sillykids.blogspot.com/2013/02/jaded-blossom-february-challenge.html )and I knew I had to make something for my sons.  I found a backpack on the Campin' Critter Cricut cartridge that was perfect for this.  I embossed the dark green flap of the backpack.  I also cut tags with a Jaded Blossom die and stamped the tag with Jaded Blossom stamps also.  I know that the backpacks are not the typical colors for Valentines, but I don't think they would really care for a pink treat holder in the shape of a backpack.  I also used a select stamps from the Jaded Blossom, Wedding Candies stamps to put cute little stamping on the small candies.  I also used a couple of stamps from the Valentine Treats stamp set to decorate a sucker in each little backpacks.
 I hope you enjoyed my sons treats and thanks for stopping by.
Margaret

Monday, February 11, 2013

My Children's Valentines

Hello!  Today I thought I would share the Valentines that my kids will be handing out in their classes this week.  I know they aren't award winning but they were very easy and something that my kids could help me with.  We have about 100 to make so it had to be easy to assemble, that was a requirement for my oldest son, Dennis.  I used the Doodle Charms and Tags & More cartridges to make these. 
I made these with to different shades of pink paper and the paper is double sided.  My kids will have a lot of options when putting these together.  I made these so that they have some samples to look at when assembling.  The stamps are by Jaded Blossom.
 
I stamped to and from on the back side of the Valentines. 
 
We are putting pencils in the treat holds that we are making.  This is the time of year that the teachers begin asking for pencils again at school.  I know some of the kids that receive them would rather get candy but this will be useful to them in class.  I had to resort to yellow pencils because I could not find any cute Valentine or any other color of pencil to use. 
 
Well I hope you enjoyed the treat holders and thanks for stopping by.
 
Margaret


Saturday, February 9, 2013

Jaded Blossom February Challenge

Hello!  Today I am posting my entry into the Jaded Blossom February Challenge.  I created two purse treat holders with non-traditional Valentine's colors for my daughters.  I used Wedding Candies, I selected stamps that were relative to Valentine's, to decorate candies that I filled the purses with.  I used the Forever Young Cricut cartridge to cut out two different purse styles. 
The brown purse was embossed and then chalked before it was assembled.  I created flowers that coordinated with the patterns that were inset in the hearts of each purse. I also used the patterned papers to create brads that were used as centers for the larger flowers.  The flowers were cut from the Tattered Flowers Alterations dies by Tim Holtz.   The brown purse is for my oldest daughter, Ruby, and the blue purse is for Katherine. 
I am also submitting this into the Decorate to Celebrate Challenge @ http://decoratetocelebrate.blogspot.com/ .  Please by and check out all the neat projects the ladies at Decorate to Celebrate have going on.  I hope you liked the treat holders and thanks for stopping by. 
 
Margaret

Thursday, February 7, 2013

Heartbreaker Layout

Hello!  Today I am posting a layout that I created for my daughter, Ruby.  Just a little background about her, she is in the 6th grade and 12 years old.  Her dad and I hear her talk about her "boyfriends" all the time.  Girls at this age this age really have no idea.  Maybe she will look back at this time in her life and smile, when she sees this many years from now.  I started with two printed papers from the Notebook Doodles Imagine cartridge and then went wild.
The title and the heart/shadow were cut from the Indie Art Cricut cartride, the pocket was cut from the Old West cartridge and I cut the graphic boy and recycle arrows from one of the sheets I printed from the Notebook Doodles Imagine cartridge.  I used a portion of a piece of Notebook printed paper from that same cartridge that I punched with a composition edge to make the journaling area in the bottom left corner. 
 
Above you can see some of the details of the heart.  I embossed the black heart with D'Vine Swirls and then chalked the embossing with coordinating colors.  This really looked good, if I must say so myself.  The wings are chipboard thats edges were inked in pink and then I just put some chucky glitter all over them.  I cut to picture mattings from a My Creative Die, one from cardstock but the other from vellum.  I ran the vellum matting through a few different embossing folders.  Below you can see the more of the detail of the pocket and the graphic boy.  I placed a red chipboard heart on the boy.  Then, I used some coordinating studs to embellish the pocket and I added eyelets to look like rivets on jeans. 
 
Inside the pocket I made some tags that she can write what she has learned or she can list all the boys that she has left with broken hearts.  I thought she would like that.  Thanks for stopping by and I hope you enjoyed the layout.
 
I am submitting this into:
The Fantabulous Cricut Challenge--Queen of Hearts
The Cuttlebug Spot Challenge--Love is in the Air
Connie Can Crop February Challenge
 
Margaret

Tuesday, February 5, 2013

Trendy Twine February Challenge- Sweets for My Sweetie

Hi!  Today I am submitting my entry into the February Trendy Twine Challenge.  I made two sucker treat holders for this challenge.  I have a die that cuts a sucker treat holder by MCT but the top of the treat holder is a scallopped circle but I wanted a heart on top instead.  I created the sucker treat holder using my Gypsy and Cricut.  I used Cherry Blow Pop, continuing with the red or pink theme.
I am not sure if you can see the embossing on the the base(pink portion of the holder), but I did emboss the treat holder to add some dimension to the holders.  I cut red scalloped hearts that were tied to the holders with white embroidery floss.  On the holder below, I cut a large heart (on white paper) and embossed it with the D'vine Swirls folder and then chalked the embossing with red chalk.  The stamps on this holder are from Jaded Blossom, Valentine Treats.
 
For the holder below, I embossed another red scalloped heart and chalked that embossing with white chalk to add some interest.  The stamps, Classmate Valentine, for this holder and the center circle die cut are from My Creative Time.  I am going to send this to my cousin, that is a teacher.  My kids may make these for their teachers this year.
 
Well, I hope you enjoy this.  I had a lot of fun making these.  Thanks for stopping by.
Margaret

Saturday, February 2, 2013

Fantabulous Cricut Challenge Blog #146- Time Flies

Hello, once again.  Today, I am posting my entry for the FCCB challenge.  I got behind on my youngest son's First Year scrapbook.  Most of the book was completed before he arrived, but I had not completed pages for January or October.  All the other months were completed and almost all the major milestones were completed in advance, but those two had me stumped.  I took this opportunity to complete the January page.  This is what I came up with.
I used the Designer Calendar cartridge for the January title, the Celebration cartridge for the hat, Elegant edges & Plantin Schoolbook for the photo matting that I created, and the Plantin Schoolbook & Tags 1 cartridge for the Top Five Tags.  I used the MCT gift card die to create the pocket for the Top 5 tags.  I embossed part of the card before I cut the die and I inked the embossing with some blue ink.  
Those tags are to write down a few of the special things.  January was a monumental month.  He took his first steps and we are starting to see more of his personality.  The flag paperclipped to the pocket is a die cut from MCT and so are most of the stamped sentiments.  I haven't put the picture in the blue matting but I will as soon as I get my photos printed.  I used a bookmark index card that I bought at WalMart (if I remember correctly).  There are 5 different colors of cards and these may come in handy for journaling.   
Looking at the index card now, I will probably distress the edges.  I didn't cut out a clock image with my Cricut.  I decided to stamp and emboss some clock faces.  The stamps were Tim Holtz.  I just cut them out and used glue dots to place them.  I added a flag at the last minute with Good Times stamped on it.  I had so much fun with this layout.  Thanks for stopping by and I hope you enjoy the layout.
 
 
Margaret

Friday, February 1, 2013

The Cuttlebug Spot Challenge-A Star is Born

Hello everyone!  I am posting my entry into this week's Cuttlebug Spot Challenge.  I have two sports stars in my family, Dennis and Ruby, they played basketball this year in Mini-Hoops.  This gave me an excellent opportunity to make a layout for their basketball season this year.  I haven't printed my pictures yet to place in the mattings, so you will have to imagine that there are cute pics in these layouts.  I made two scrapbook pages with the same layout for both.
Their mascot is a lion (from Team Spirit cartridge), school colors are red, white & blue, and both of them were #23 (jersey from basketball cartridge).  I used MCT dies for the smaller matting and the strip that has sentiment stamped (MCT stamps) on it.  The larger matting was created with my gypsy.  One of the mattings was ran through a star embossing folder before cutting with the die.  I then used red and blue chalks to enhance the star embossing.  I used the same technique except with a different embossing folder and ink instead for part of my title.  You can get a closer look at these two items below.
I cut out stars from the Plantin School cartridge and used Sports candies stamps by Jaded Blossom to add more detail.  I used a set of Doodlebug font stamps for the letters to makeup their names on each layout.  I also used a ticket stamp in a set by Karen Foster to make my journaling area.  This turned out super cute!
 I included below a picture of my daughter, Ruby's page. 
I hope you liked this layout and thanks for stopping by.
 
Margaret